
A window espag rod transfers handle movement to the locking points along the sash. Buyers may call it a transmission rod, espagnolette rod, locking drive rod or multipoint locking rod. To match a replacement or approve an OEM order, record the complete interface: rod length, gearbox position, handle connection, mounting holes and locking-point locations.
This guide explains what to measure before requesting a sample. Start with the window transmission rod range, then use the measurement checklist below to identify the configuration your window system needs.
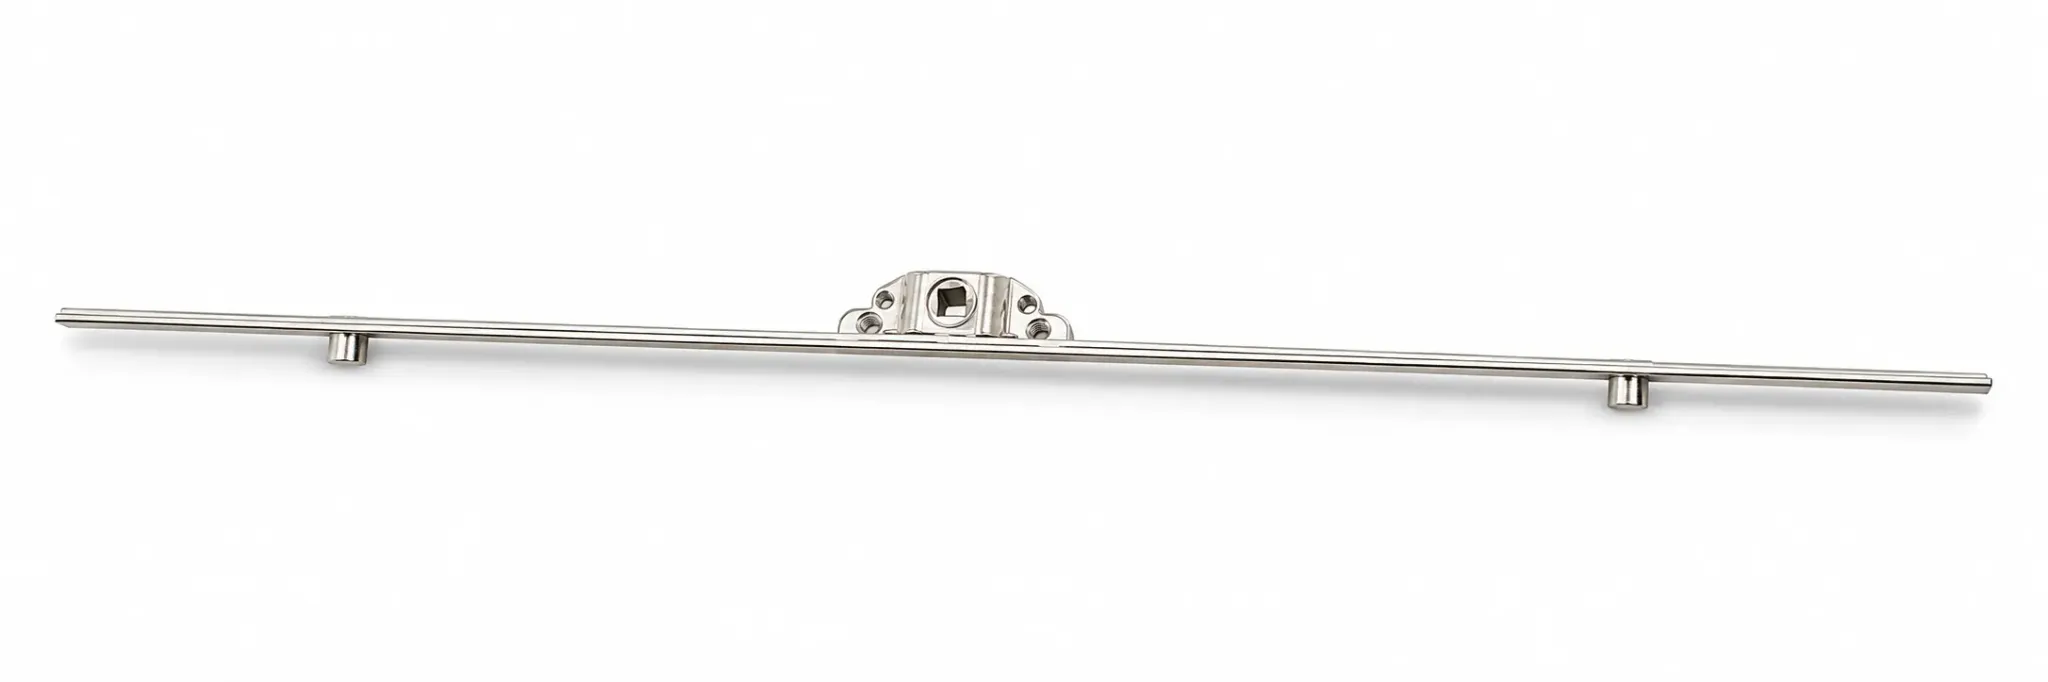
1. Identify the window and the existing mechanism
Photograph the window open and closed, the complete rod, the handle, each locking point and the frame-mounted keepers. Record whether the sash is side-hung, top-hung, inward-opening or sliding, together with the profile brand or drawing number if available. An aluminium (aluminum) frame and a uPVC frame can require different groove dimensions and locking interfaces even when their handles look similar.
Keep the handle, rod and keeper information together. A matching overall length alone does not establish compatibility. Before dismantling hardware, support the sash safely and follow the window system’s maintenance instructions.
2. Measure overall rod length and gearbox position
Measure the rod end to end and mark both ends on a simple sketch. Identify the centre of the handle spindle opening and measure from that centre to each end. This shows whether the drive is centrally positioned or offset. Photograph the tape measure beside the rod so the quotation team can see the reference points.
Also record the faceplate or rail width and thickness, the gearbox envelope and any projecting components. State whether dimensions are taken from the existing part or a profile drawing. If a supplier uses a different length convention, reconcile the two drawings before ordering.
3. Confirm backset and handle-interface dimensions
Backset is a specific dimension on an espagnolette drawing. Use the manufacturer’s indicated reference line and measure to the handle-spindle centre. Do not substitute the spacing between screw holes, the height of a pin or another dimension labelled “centre distance.” These dimensions describe different interfaces.
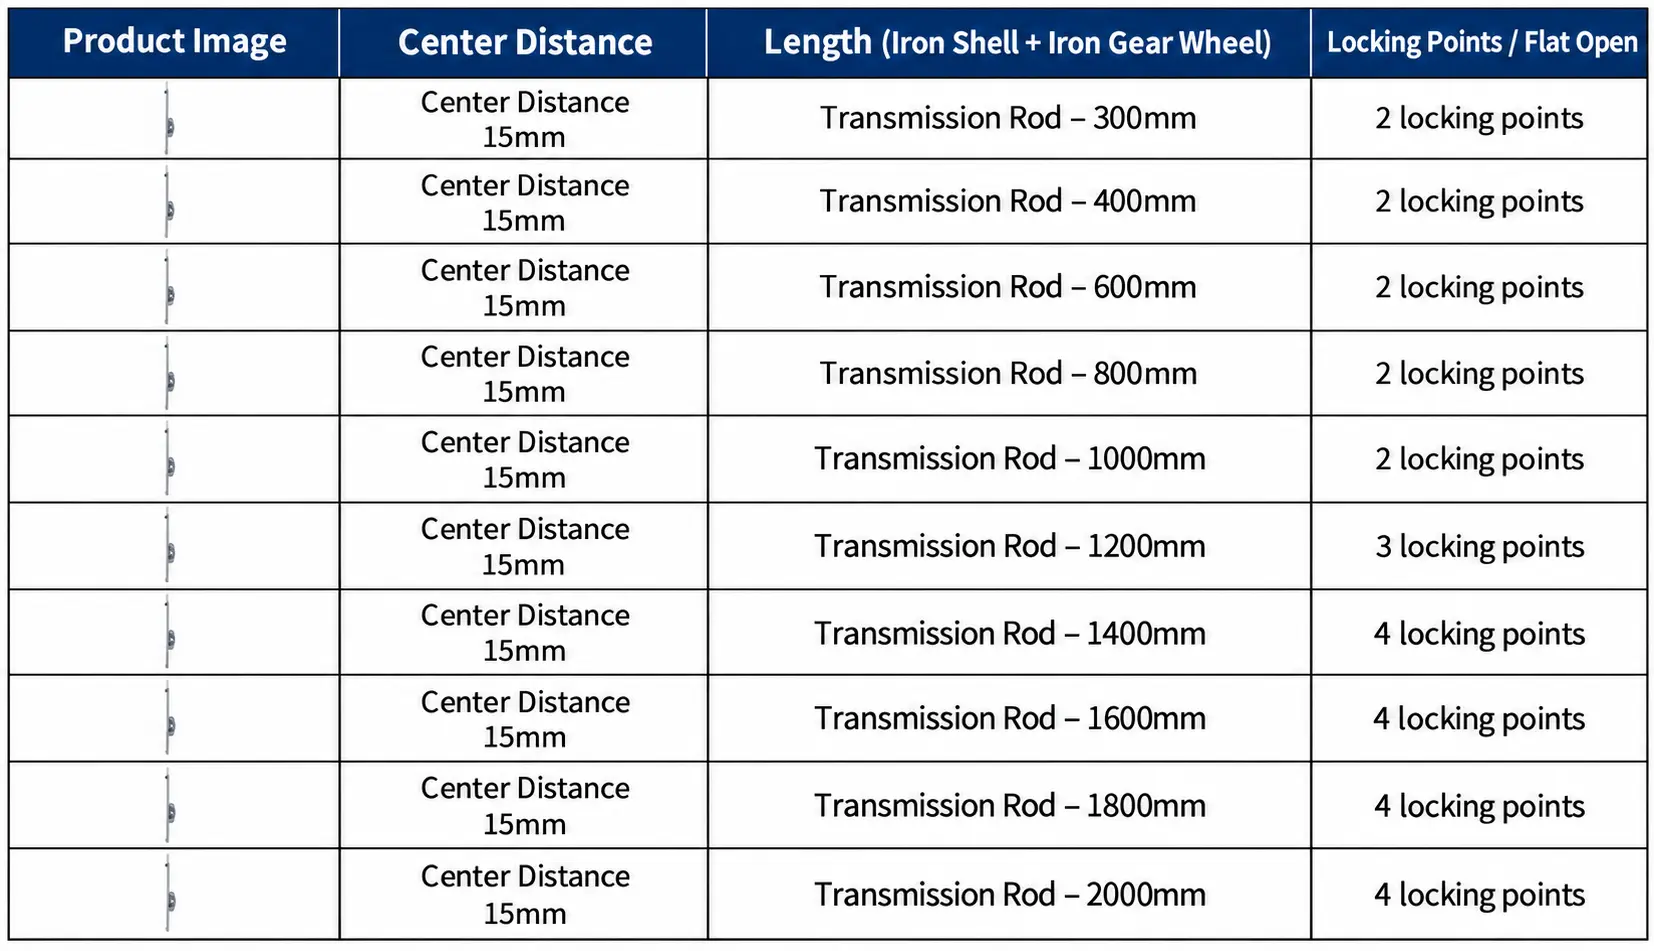
The supplied Gleam series chart labels a dimension as “Center Distance 15mm.” Confirm its measurement endpoints against the sample or drawing before identifying it as backset. For a handle match, record the spindle cross-section and size, required engagement, screw spacing and mounting arrangement separately. A clear side-view photograph helps explain components hidden in a front view.
4. Record every locking point and keeper
Count the locking points and note their shape. Measure their positions from one named rod end or from the spindle centre, using the same reference throughout. Record the pin projection and the keeper opening, fixing-hole positions and mounting height. Photograph the sash and frame engagement rather than assuming any supplied keeper will fit.
| Gleam nominal length options | Locking points in this series | Product selection |
|---|---|---|
| 300, 400, 600, 800 and 1000 mm | 2 | Two-point window espag transmission rods |
| 1200 mm | 3 | 1200 mm three-point espagnolette rod |
| 1400, 1600, 1800 and 2000 mm | 4 | Four-point multipoint transmission rods |
This is the selection schedule for the illustrated supply series. Other window systems can use different length and locking-point combinations. Final positioning must match the approved hardware drawing and profile.
5. Check travel, engagement and sample operation
Record the handle movement and the rod’s travel between its operating positions. Check that the pins enter and release the keepers correctly, that the handle returns through its intended movement and that the sash closes without forcing the mechanism. Confirm clearances with the complete profile assembly, including seals and screws.
For a new order, approve an assembled sample before bulk production. Do not shorten, drill or modify a rod unless the chosen system permits it. Use the quotation enquiry to send your dimensioned sketch, application photographs, quantities and material or finish requirements. Free samples are available; confirm sample scope and shipping arrangements when enquiring.
For screw installation, record the fixing-hole layout, screw specification and any profile reinforcement. Use the assembled sample to confirm smooth opening and closing; if quiet or silent operation is a project requirement, agree the acceptance conditions with the supplier before bulk approval.
Frequently asked questions
Can I order an espag rod using only its overall length?
Overall length identifies one dimension. Also confirm gearbox position, backset reference, handle interface, rail dimensions, locking-point locations, keepers and operating travel against the profile or sample.
Does “Center Distance 15mm” automatically mean 15 mm backset?
No. The label alone does not identify the measurement endpoints. Confirm the dimension on a drawing or sample before treating it as backset.
Are the length and locking-point combinations universal?
No. The table describes this Gleam supply series. Other systems can use different configurations, so approve the complete interface and sample before ordering.
Further reading and technical references
Continue with the uPVC, aluminium and OEM compatibility guide. Reference technical information: Titon Maco Inline technical information lists rod length, backset, cam size and profile information as separate ordering details and identifies keepers as profile-related. Nico Standard Espagnolette technical data illustrates how available lengths and cam counts vary by system. These references explain selection principles; their dimensions and test results are not specifications for the Gleam products.
Related Window Espag Rods
Choose the length and locking-point layout, then check the complete profile, handle and keeper fit on the product page.
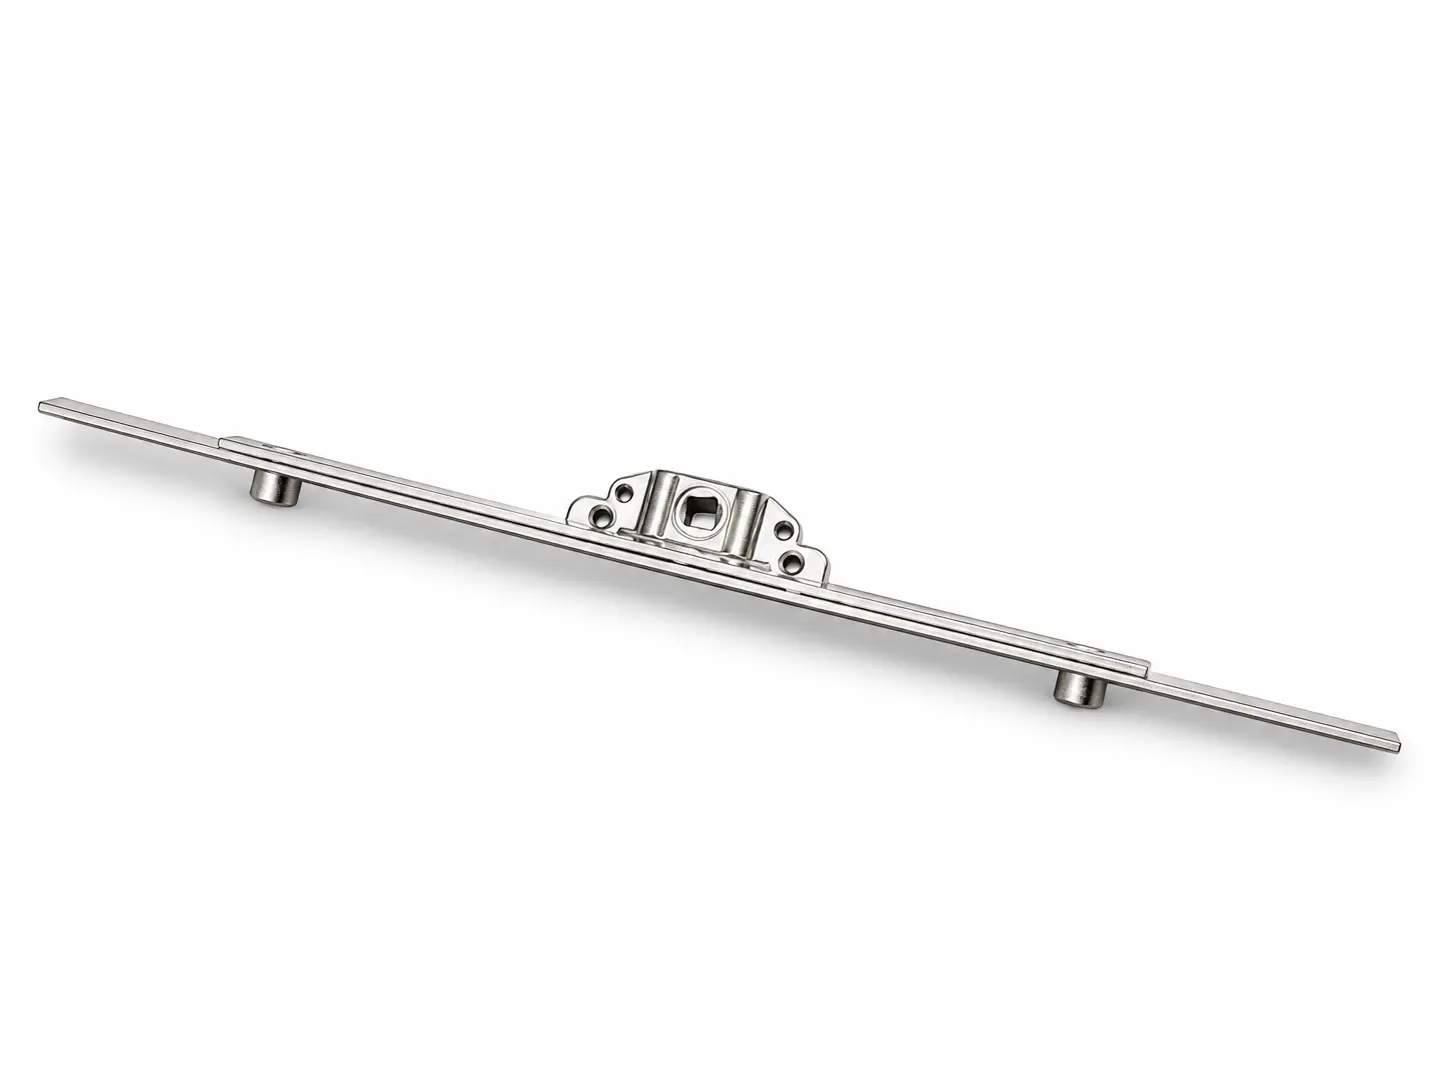
300–1000mm Two-Point Window Espag Rods
Choose 300, 400, 600, 800 or 1000 mm lengths with the two-point layout in this series.
1200mm Three-Point Espagnolette Rod
Compare the 1200 mm three-point configuration. The image is the series specification chart.
1400–2000mm Four-Point Transmission Rods
Choose 1400, 1600, 1800 or 2000 mm lengths with four locking points. Image: series specification chart.
Request Your Window Espag Rod Quotation
Send your required lengths, quantity by size, window profile or drawing, handle and keeper details, packing requirements and destination for an OEM quotation.