
Knowing how to install a glass door pull handle begins before the handle reaches the door. The installer needs an approved drilling layout, the correct handle pair or single-sided fixing arrangement, nonmetallic isolation components and a complete hardware kit matched to the glass thickness.
This guide helps importers, distributors, door fabricators and project teams define an installation-ready set. It does not replace the door-system drawing or the instructions of the responsible glass and hardware professional. Never drill, grind or modify tempered glass on site.
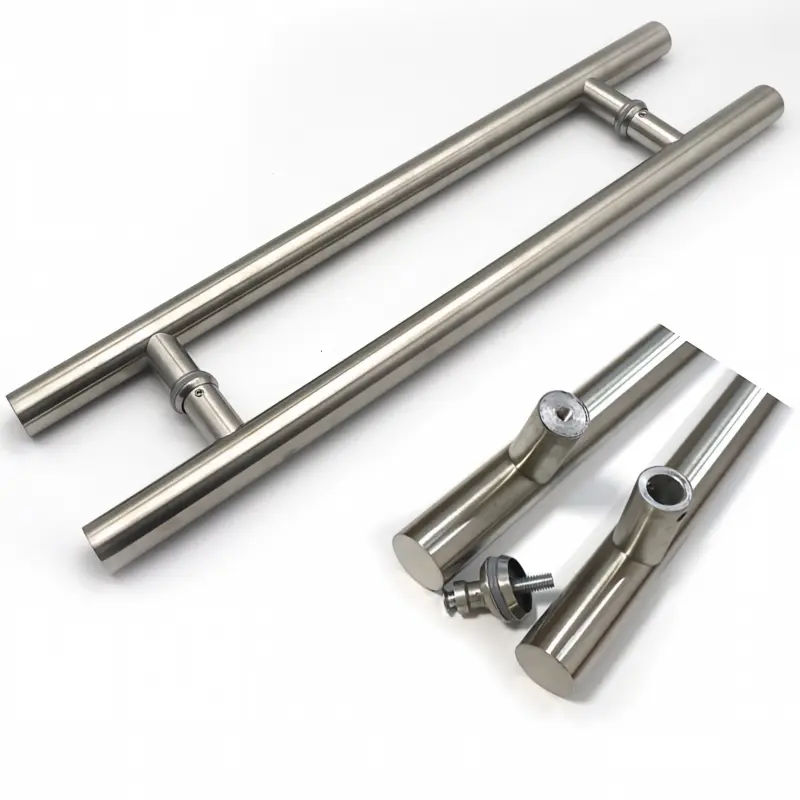
Back-to-Back vs Through-Bolt Mounting
| Mounting arrangement | Typical construction | Checks before fitting |
|---|---|---|
| Back-to-back pair | A grip on each side, connected through prepared glass holes | Inside/outside orientation, post alignment, glass isolation and equal engagement |
| Single-sided / through-bolt | Grip on one side with a bolt, cap or plate on the opposite side | Bolt length, finished reverse side, cap/plate clearance and approved kit |
| Offset or cranked pair | Asymmetric grips or displaced hand position | Offset direction, opening swing, frame clearance and orientation on the drawing |
Names differ between markets, so specify the assembly with a section drawing rather than relying only on “back-to-back” or “through-bolt.”
Installation Kit Checklist
- Correct handle model, overall length and C-to-C mounting centers
- Matched posts, collars or cover caps
- Nonmetallic sleeves and washers that isolate metal from glass
- Bolts or connecting studs with the approved length and thread
- Any locking compound or tool specified by the hardware manufacturer
- Door drawing, component list and finish-protection instructions
Use the glass door handle size chart to separate overall length from C-to-C. For a measurement method, see how to measure glass door handle hole spacing.
How to Install a Glass Door Pull Handle
- Verify the door and drawing. Confirm the correct panel, opening direction, glass thickness, prepared-hole diameter, C-to-C, edge offsets and nearby hardware. Stop if the door differs from the approved drawing.
- Inspect the complete set. Compare grips, posts, collars, sleeves, washers and fasteners with the packing list. Check threads and visible surfaces before bringing metal close to the glass.
- Protect and support the door. Follow the door-system procedure and use qualified installers. The panel must remain stable while the handle is aligned.
- Position the isolation components. Place the specified sleeves and washers so metal does not bear directly on the glass. Do not improvise the stack or omit components.
- Align the first grip and connectors. Keep the posts square to the prepared holes without forcing the assembly. For an offset model, verify that the long and short sides face the correct direction.
- Present the mating grip or reverse-side fixing. Engage all threads by hand before final tightening. Cross-threading or pulling misaligned parts together can damage the hardware or load the glass unevenly.
- Tighten evenly. Follow the approved hardware instruction and tool/torque requirement. Alternate between fixings and keep the handle aligned. Do not use an assumed universal torque value.
- Complete an operational check. Open and close the door slowly. Check hand clearance, frame/panel clearance, handle movement, cover seating and visible glass contact. Record any reinspection interval required by the project.
Choose the Installation Route by Handle Type
- 600 / 800 / 1000mm straight pulls: confirm the exact size combination and handling of the longer grip.
- U shaped commercial pull: verify return depth and hand clearance.
- Offset cranked pull: confirm orientation and collision clearance from the plan/section drawing.
- Frameless shower handle: check sliding overlap or hinged-door swing and the compact fixing kit.
- Custom hole-pitch handle: match existing prepared holes from measured data or an approved sample.
See the glass door handle manufacturer and supplier category for all models and the selection table.
Common Installation Problems
| Symptom | Check first |
|---|---|
| Posts do not align | C-to-C, hole diameter, model, orientation and drawing revision; do not force the handle |
| Metal touches glass | Missing, damaged or incorrect sleeves/washers; stop and correct the kit |
| Handle loosens | Thread engagement, component stack and specified tightening method; follow the project reinspection plan |
| Door hits another panel | Projection, offset direction, opening travel and adjacent clearances |
| Finish is damaged | Tool contact, protective wrapping and cleaning products; replace visibly damaged parts when required |
Installation FAQ
Can installers drill tempered glass for a new handle?
No. Prepared holes must be designed and made before tempering by the responsible glass supplier. Do not drill or grind tempered glass on site.
How tight should the handle bolts be?
Use the instruction and tool/torque requirement approved for the actual handle and isolation stack. A universal value should not be assumed.
Can a back-to-back kit be used on 8, 10 and 12 mm glass?
Only when the sleeves, washers, studs or bolts and approved hardware drawing cover the selected thickness. Confirm the complete kit, not only the grip.
Is the pull handle a grab bar?
No. A door pull is an operating grip and should not be treated as a body-support or structural safety device.
Request an Installation-Ready Handle Set
Send the door drawing, handle model, C-to-C, glass thickness, hole diameter, mounting arrangement, finish, complete-set quantity and destination.